
Touratech locking GPS mount for zumo XT & other units
(Ed. note – read Roger Wiles’ review of the Garmin zumo XT elsewhere in Motorcycle Test Kitchen!)
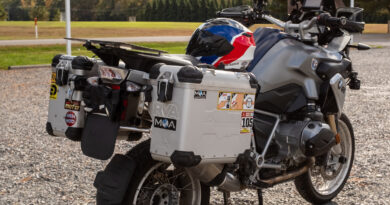
German manufacturer Touratech’s familiar high-end design and rugged construction are immediately evident in their Locking GPS Mount. This one is specifically for Garmin’s zumo XT, but fitments for other Garmin units are also available, along with additional mounting configurations; see Touratech’s website for the full range of options. This mount is a viable alternative for those who don’t want to use the Navigator GPS/mounting bracket setup supplied by BMW on some models, or it can serve as a stand-alone solution for those whose bikes didn’t come with such provisions. The zumo XT offers features not found on the Navigator VI, although it won’t run through BMW’s handlebar controls and TFT dash. Likewise, this Touratech mount has advantages over the factory piece, including fully adjustable positioning and portability, though some additional work is required by the end-user to make it as secure as the stocker. (If you aren’t interested in maximizing overlap with the OEM setup, you can skip some of the more involved installation steps discussed later.)
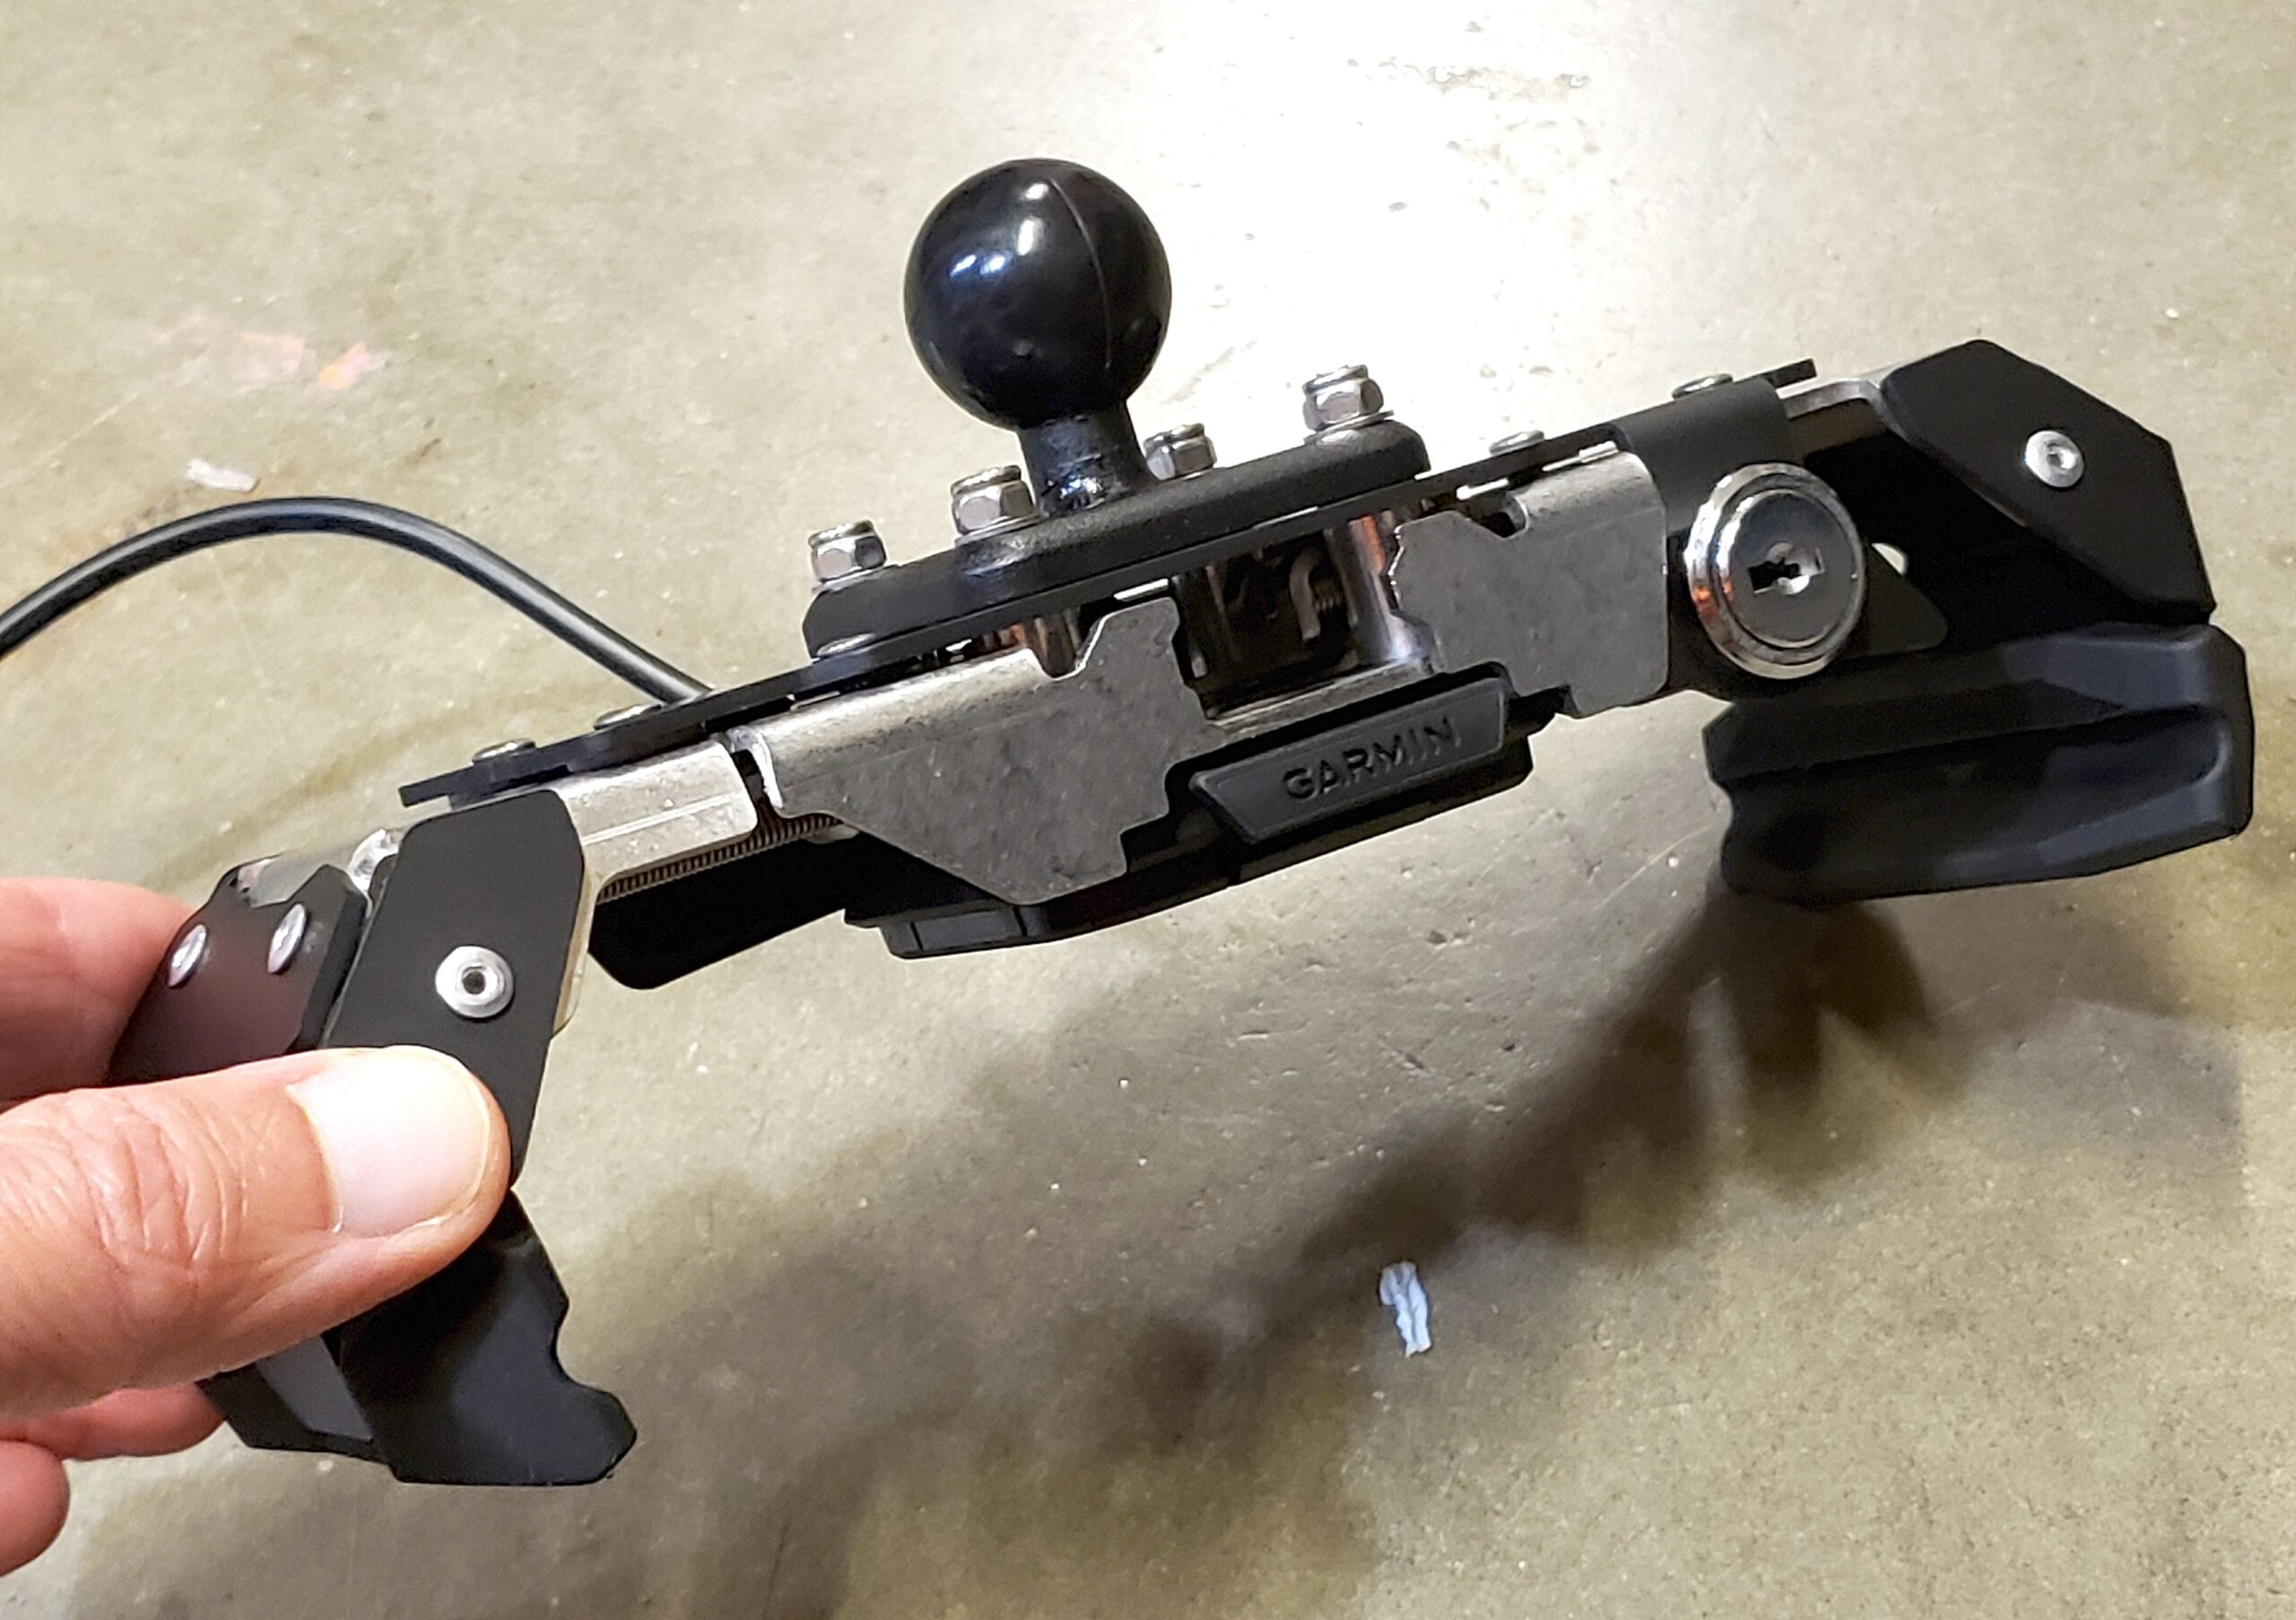
The Touratech mount’s cradle is essentially a spring-loaded clamp constructed of stainless steel, black anodized aluminum, and rubber components. It closes to hug the GPS unit along its short sides and can be locked in this embrace with a key. When unlocked, a small button on the mount’s lower edge (in landscape orientation) unlatches the clamping mechanism and it springs open. The zumo XT remains firmly attached to a dock inside the cradle until released by a separate button there (impossible to depress while the mount clamp is closed). This dock and its wiring are not included with the mount; they’re packaged with the GPS unit and get transferred to the Touratech cradle. Users can choose from three mounting options. Two bracket configurations allow attachment to a ½” crossbar or Touratech’s GPS mount adapter in either landscape or portrait orientation, or a RAM ball (included with the XT, not the Touratech mount) can be affixed for use with any compatible RAM hardware. The chosen mounting option is installed in conjunction with the dock; they sandwich the mount with the use of screws made inaccessible by the GPS unit when it’s clamped in place.

Touratech includes an optional Allen screw to replace the tightening knob on a RAM arm, like the one Garmin includes with the zumo XT. This makes it a little harder for a would-be thief to remove the locked mount and GPS unit from the bike, but for elevated security, I used a tamper-resistant Torx screw (M6 1.0 x 40mm button-head, with matching nyloc nut), which requires a more specialized wrench for disassembly. Given the ease of removing an Allen screw and the considerable hassle/expense of obtaining this substitution (try finding such an uncommon size and style fastener for non-bulk purchase!), Touratech really should have supplied the tamper-resistant Torx screw. What’s the point of locking your expensive GPS unit into a fancy mount that can be easily detached from the bike with nothing more exotic than a 4mm Allen key and wire dykes? This is my only complaint. Update: After I finished this modified installation, I discovered RAM now makes a theft-proof pin-lock knob to replace the standard piece, which is both cheaper—at $8.99—and more convenient than the setup I used, given the necessity of buying a whole box of unneeded screws.
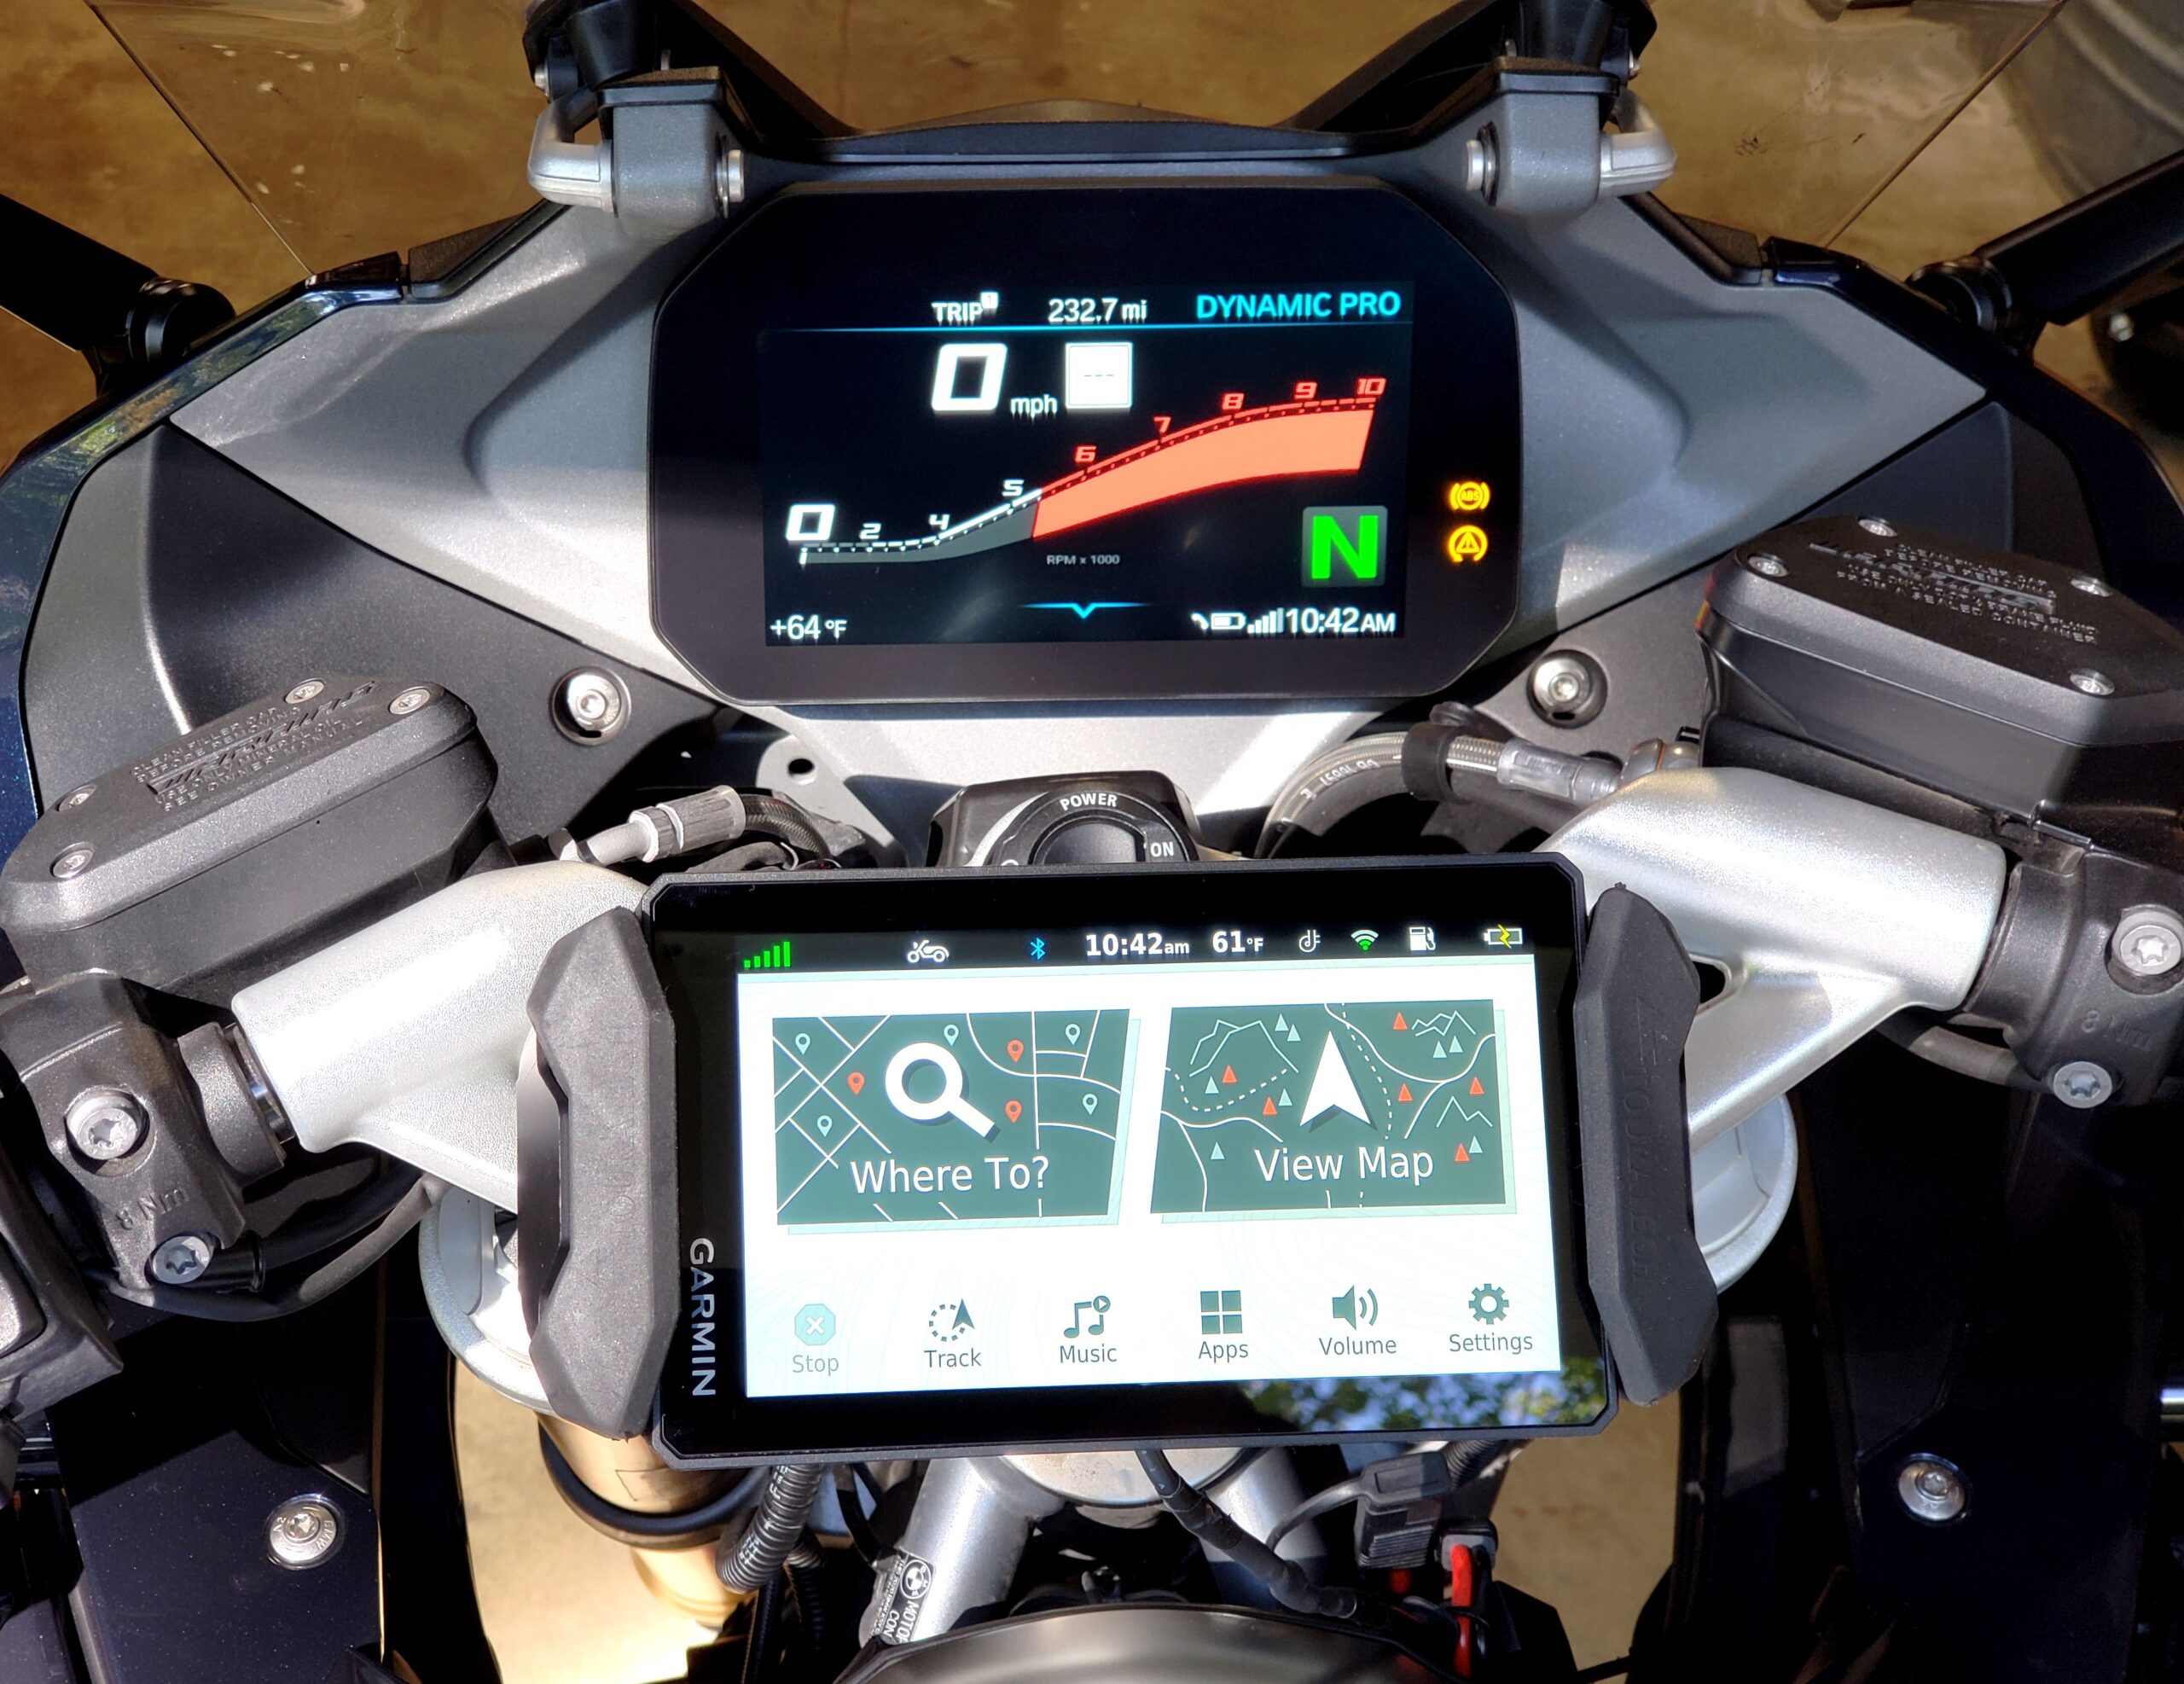
Once installed, the Touratech mount works beautifully. Popping the GPS unit in or out is quick and easy, and the lock feels smooth and solid (it can be keyed to match your other Touratech products). Perhaps more importantly, the mount’s location is readily customizable over a wide range of possibilities, using RAM or other aftermarket parts. I simply replaced one of my bike’s handlebar bridge screws with a RAM ball (~$13), then used the short RAM arm supplied with the zumo XT to connect the mount to it. I can swivel, tilt, and raise the cradle in a multitude of arrangements, whereas BMW’s fixed Navigator mount allows only tilting in one plane. Also, the Touratech cradle’s thick rubber clamping surfaces appear likely to offer more vibration and shock absorption than the tiny rubber grommets on the OEM mount. The RAM hardware included with the XT provides no such protection.
Alongside the mount’s mechanical installation, there’s the task of wiring the GPS dock. The zumo XT can be used without an external power supply for up to four hours, depending on how much you ask of it. If you’re content to charge your GPS unit off the bike between relatively brief uses, the electrical connection can be easily omitted, since the cable is detachable from the dock. Those not intent on approximating the OEM setup can just snake the lengthy Garmin power cable through their bike’s torso and connect it directly to the battery with ring terminals. I wanted to retain at least some of the benefit of using the stock GPS connection. Although integration with the onboard controls and display isn’t possible, I would still have the peace of mind provided by a key-switched power supply which prevented the GPS from being left on accidentally or activated by a passerby when the bike was unattended.
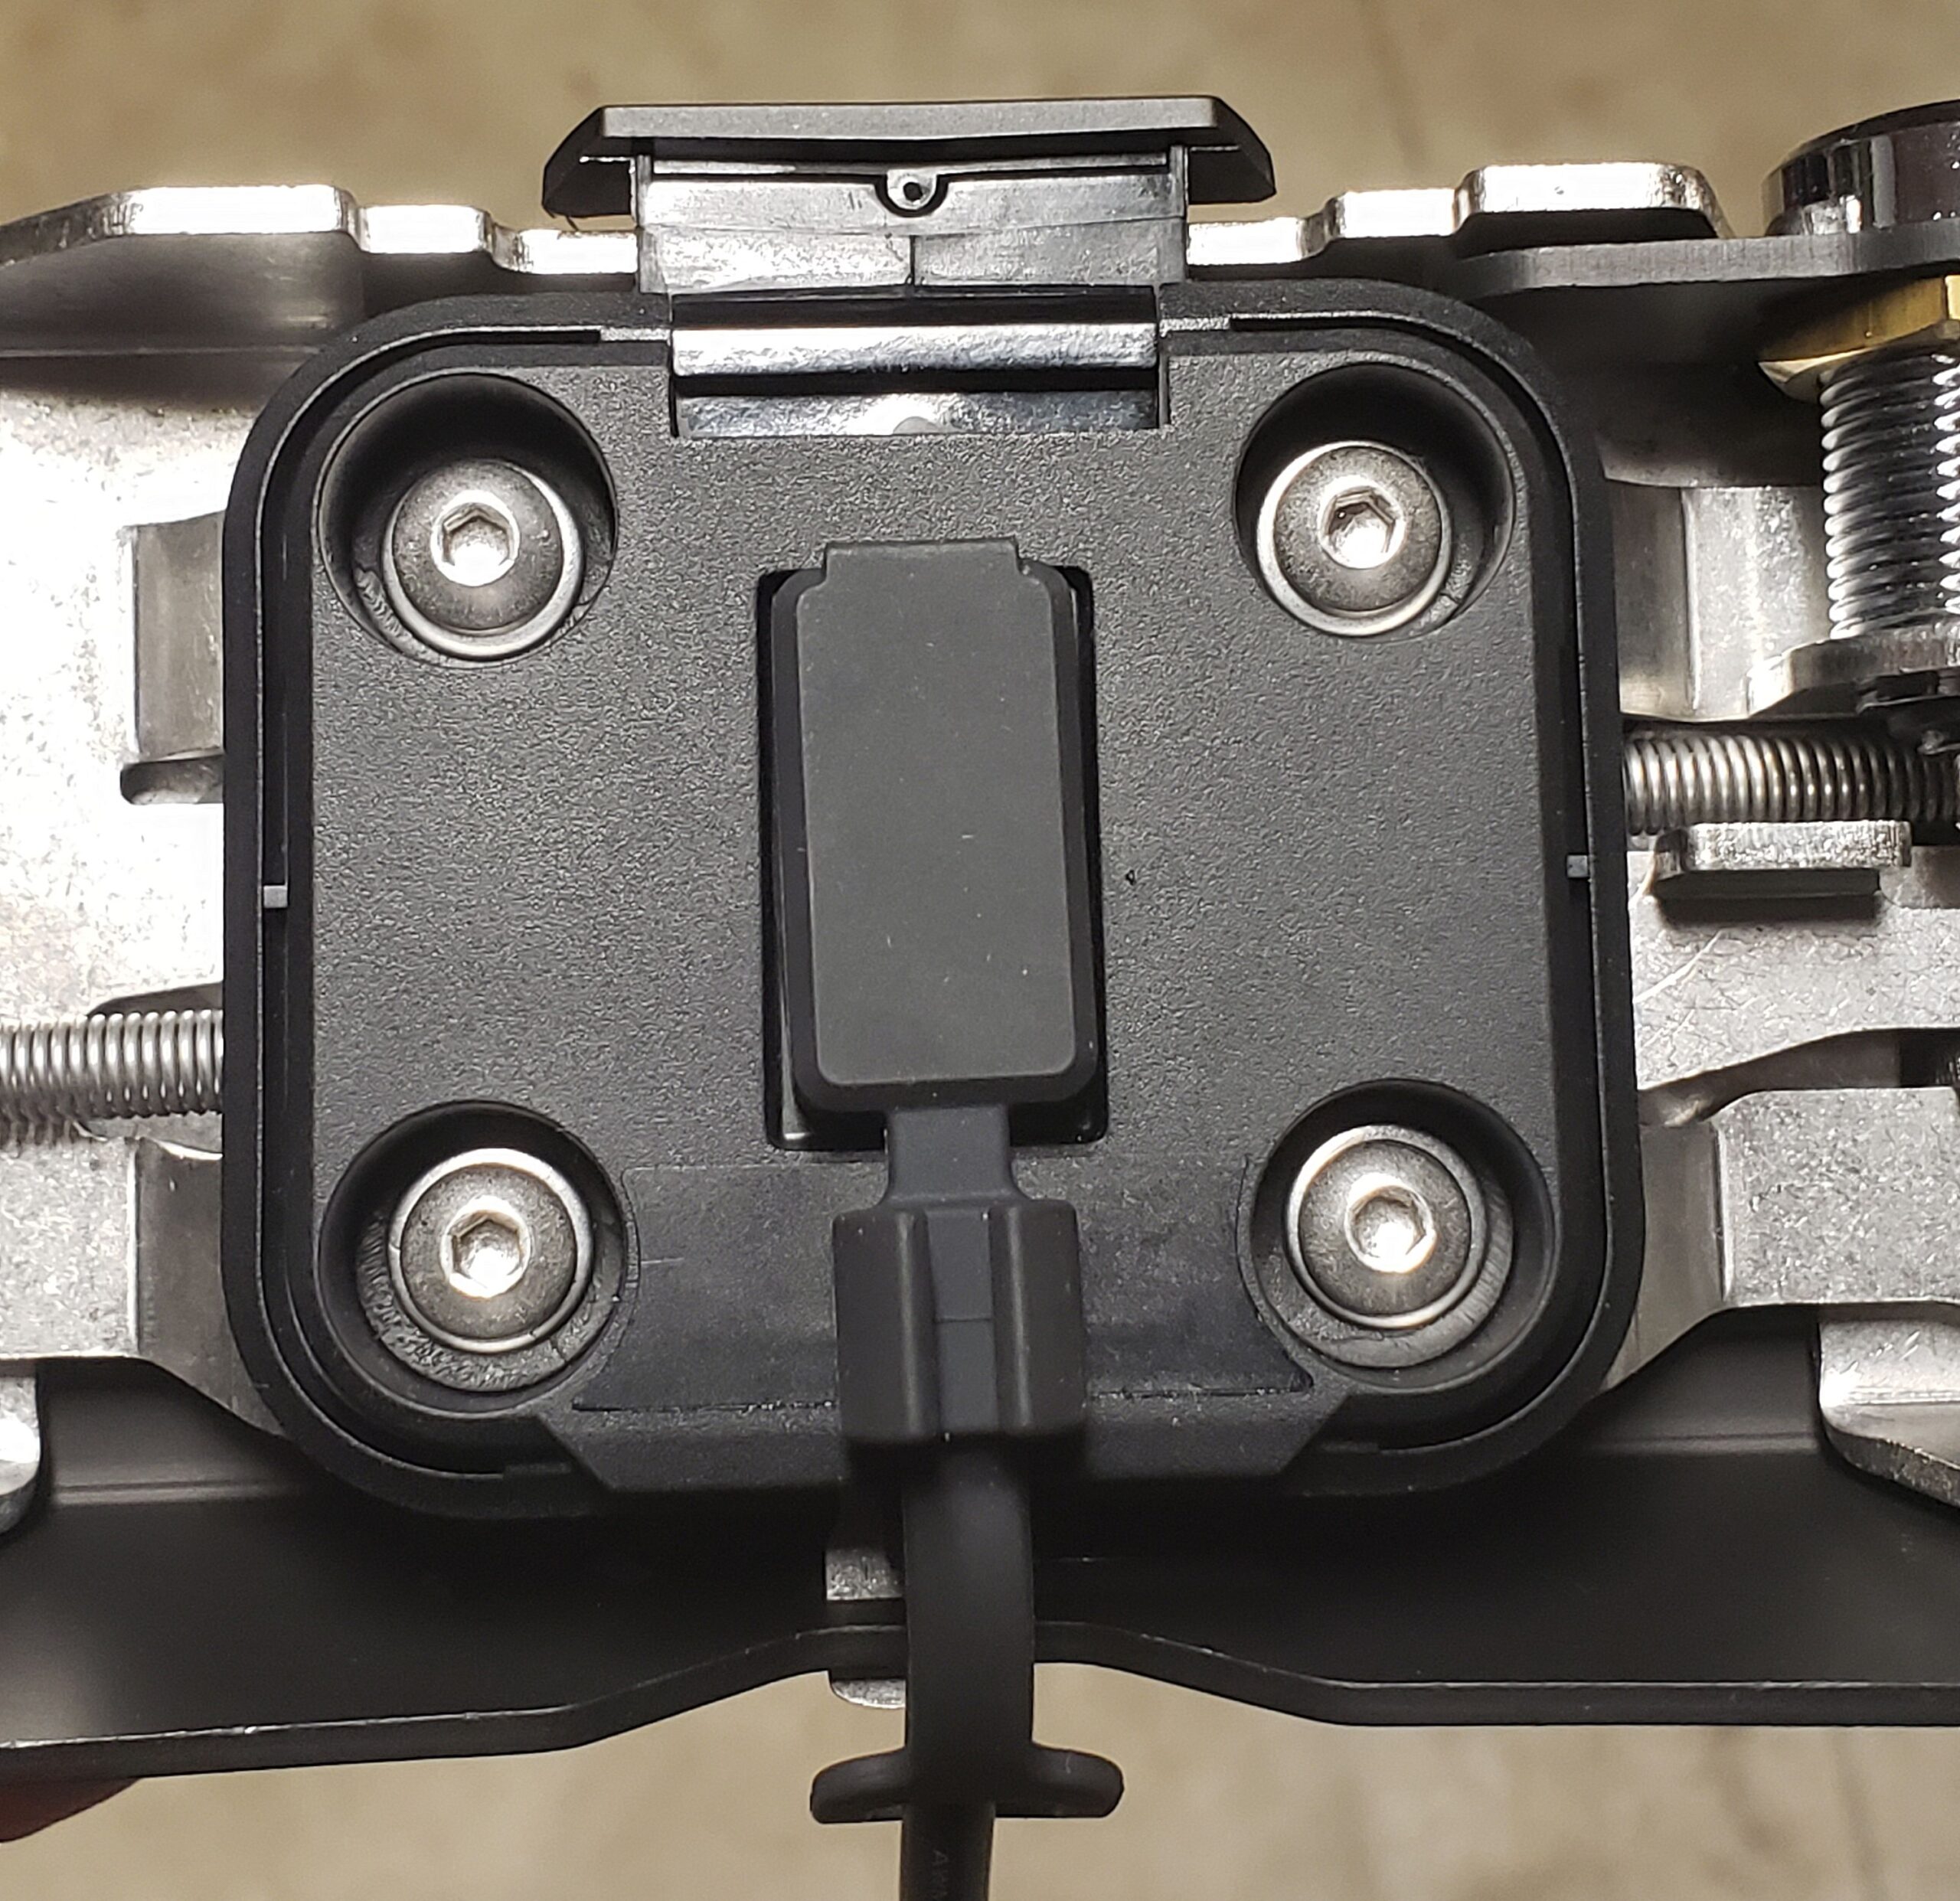
Replicating the factory power connection on my R 1250 RS began with hunting down the plug used by the OEM GPS mount. It probably resides elsewhere on other bikes, but mine was easy to find behind the right-side fairing panel. It’s not a readily matched plug, of course, but its mate can be scavenged from the discarded stock mount. I suspect BMW uses the same wiring harness on all bikes of the same model, regardless of trim level. If I’m correct, any bike that could have been sold with the OEM GPS mount would have this onboard plug, whether or not it actually came outfitted with said mount. If your bike has the onboard plug, but you didn’t get the factory GPS mount, you can’t simply snip off the stock mount’s plug and use it with the Garmin cable. Instead, you’ll have to remove the onboard plug and work directly with the wires feeding it. What follows still applies.
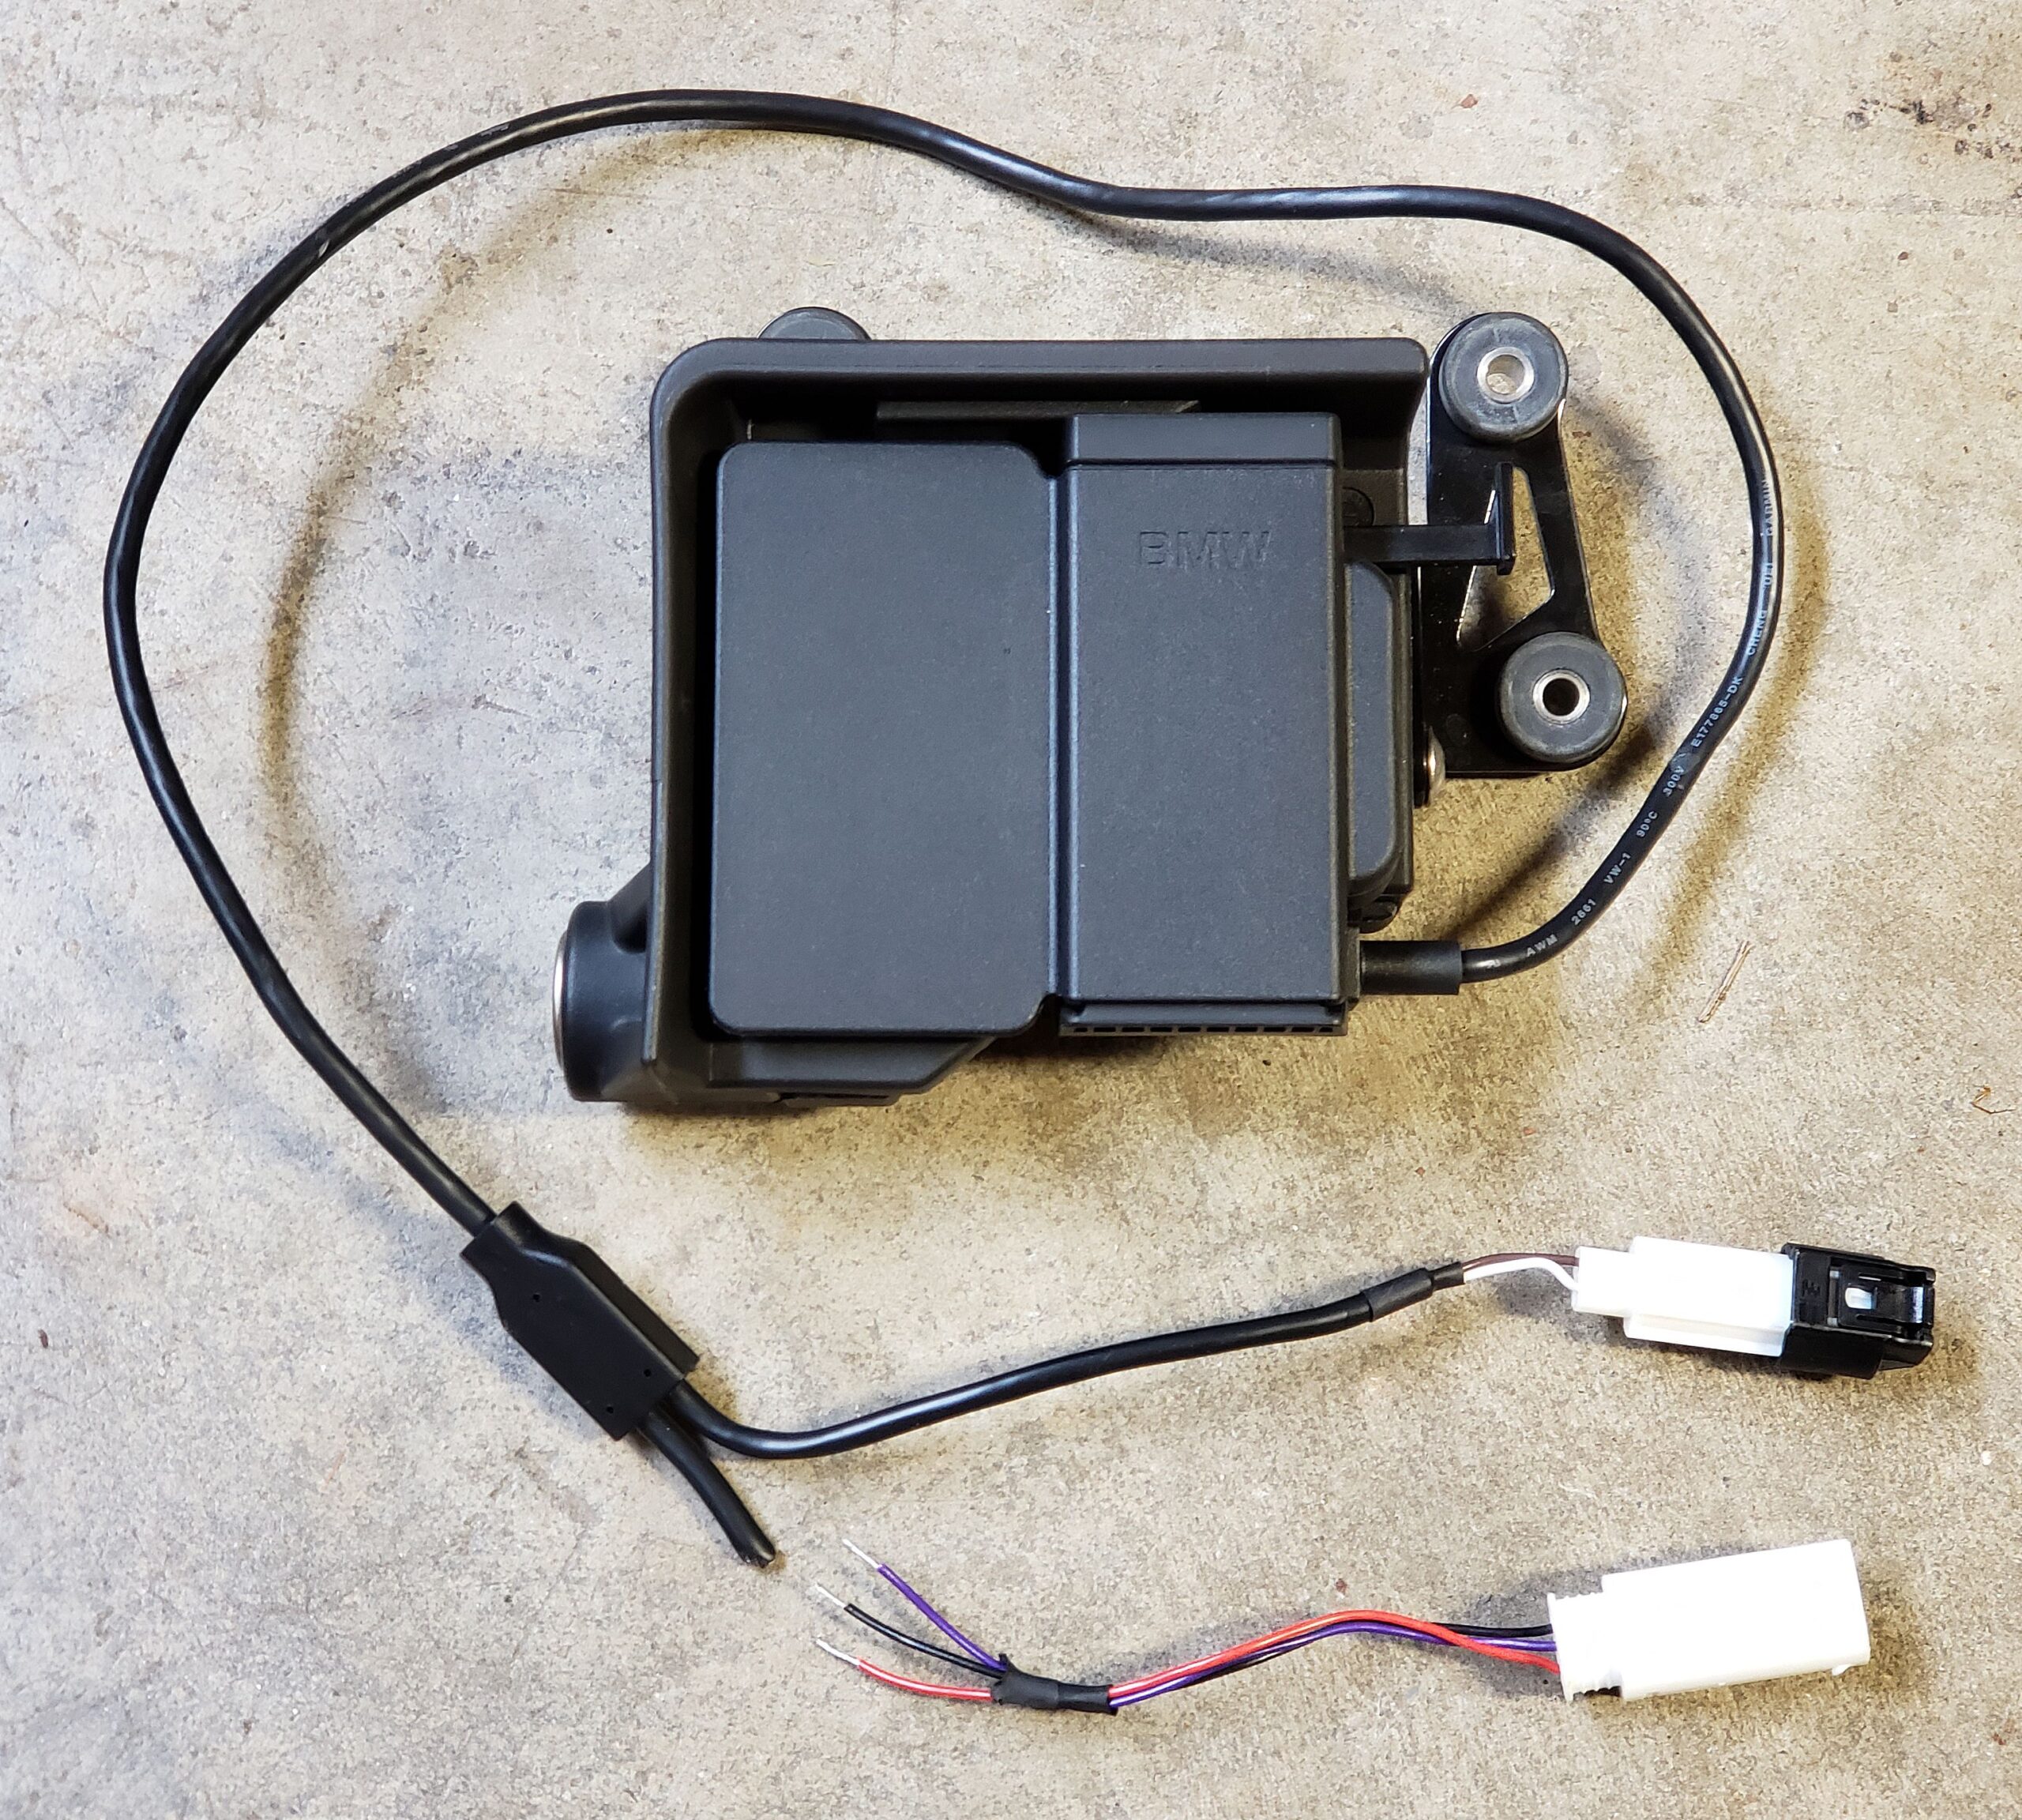
The stock plug has three wires: a red power supply (hot), a black ground and a purple one that seems to carry communications or data specific to the Navigator units. Note that BMW’s GPS mount has two cables running from it: one with three wires to the plug just mentioned, and one with two wires going to a different plug. I couldn’t find a match for the latter on my bike, so I assume it’s employed on some models and not others. In any case, that plug is irrelevant for this project and can be ignored. The zumo XT cable is comprised of just two wires, a power and ground. Transferring the OEM GPS mount plug is simply a matter of soldering the red and black plug wires to the corresponding Garmin leads, while leaving the purple wire disconnected (but safely insulated).
Although it would have been simpler to attach the plug directly to the Garmin cable, I wanted to add a convenience not available with the stock setup—the ability to easily unplug the GPS mount from the bike without removing bodywork. To facilitate this, I inserted an SAE plug into the equation by using a fallow Battery Tender cable with the clamps cut off. If you do the same, be sure those hot and ground wires end up on the proper sides of the SAE plug. Obviously, you’ll need another SAE plug for the terminus of the Garmin cable, also matched for hot and ground. Spending less than ten bucks on an SAE extension cord gets you both the plugs you need, but using an old Battery Tender cable adds an inline fuse on the hot side. Garmin says a fuse isn’t needed, even when connecting directly to the battery, but I had the part lying around and figured extra protection couldn’t hurt.

Because the Garmin cable is quite long (75”) and my bike has little room for stowing excess, I shortened it drastically. This had to be done in two places, since there’s an inline voltage converter in the middle of the cable. The portion below the converter is simply two parallel wires, easily cut to length and separated for soldering, whether to the wires exiting the OEM mount’s severed plug, the wires that fed the removed onboard plug, or an SAE plug, like I used. The portion above the converter is coaxial and a bit trickier to modify. When removing the outermost insulation, you must be careful not to slice into the delicate wire filaments just beneath it. These metal wisps are then gathered to one side and twisted together to create a firm stub amenable to soldering. A short jumper may be required to connect these stubs on both sides of the removed portion, since they’ll be further apart than the central wire which gets stripped and soldered conventionally.
To avoid the necessity of a jumper, remove the outermost insulation well below the cable’s cut end, making the stub of outer wire filaments fairly long. Then you can trim the inner wire further back and snip it short enough to allow soldering both connections at exactly the same length. (Putting this into words makes it sound more complicated and awkward than it really is; see photos.) Wrap soldered connections with electrical tape to prevent short circuiting, and tidy everything up with heat-shrink tubing (you did remember to slide that on before soldering those connections, didn’t you?).

Ultimately, I ended up with a short cable running from the OEM plug to an SAE plug, and another short cable running from the Garmin dock to an SAE plug, made even shorter by zip-tying a small loop in it. I ran the first cable from the onboard plug up through gaps along the frame, then zip-tied it near the steering head; the second cable dangles off the mount. My SAE connection now rests comfortably in the fairing cavity around my forks without a tangle of extra wire to secure. It’s easy to access, but also discreetly out of the way.
The Touratech mount can be left in place indefinitely, courtesy of a little rubber cap that protects the dock’s electrical contacts when the GPS unit is removed. However, if I want to eliminate clutter when not using GPS, I can quickly delete the extraneous hardware by unplugging the SAE connection and loosening the single Torx screw to remove the RAM arm/mount assembly. To do the same with BMW’s GPS mount, I’d have to remove and replace the four screws that attach it to the handlebar bridge and pull my right-side fairing panel (11 more screws!) to unplug the cable. In addition, I can transfer the Touratech/zumo XT combo to any other bike with a RAM ball and SAE power cord; the BMW Navigator setup only transfers to another late model BMW designed to accept it.
At $199.95, Touratech’s GPS mount isn’t cheap, but its utility and build-quality justify the price. The zumo XT costs $499.99, and I spent another $35 on a RAM ball, SAE cable, and box (!) of tamper-resistant Torx screws. A generic carrying case for the GPS unit added $10 more. The total cost was still less expensive than the Nav VI’s $899.00 MSRP (not counting the cost of BMW’s mount), and I’m enjoying features and versatility I wouldn’t have gotten with the dedicated Nav VI setup. The Touratech mount’s adjustability and convenience (especially when wired with an SAE plug), along with the zumo XT’s additional functions, make this alternative a serious competitor for the Nav VI, even when sacrificing the latter’s integration with BMW’s onboard electronics.


Pingback: Garmin zūmo XT: The Complete Nav – BMW Owners News